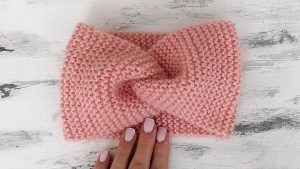
A 4 color granny square is a delightful way to bring vibrancy, texture, and a touch of personality to your crochet projects.

CROCHET 4 COLOR GRANNY SQUARE
Granny squares are timeless, but adding four colors elevates them to a new level. Here’s why: Visual Interest: Mixing four hues creates a bold and dynamic pattern; Stash-Busting Potential: A great way to use leftover yarn in a cohesive design; Customization: Adapt colors to match a theme, season, or personal style; Perfect for Beginners: If you’ve mastered basic granny squares, this variation is a fun next step. Whether you’re crafting a cozy blanket, a stylish bag, or a decorative pillow, this technique allows for endless creativity. In this guide, you’ll learn how to make a 4 color granny square step by step, along with expert tips on choosing color combinations, joining squares seamlessly, and incorporating them into larger projects.
Squares Related Posts:
Related Posts
Let’s dive into the world of multicolored crochet magic!

Materials
To make a 4 color granny square, gather these essentials: Choose four colors of the same weight (cotton, acrylic, or wool). For the hook, choose a size that complements your yarn, typically 3.5mm crochet hook. Use scissors for trimming yarn ends, tapestry needle to weave in loose ends neatly, and stitch marker to track rounds easily. 💡 Pro Tip: Use colors with strong contrast to make each section stand out!

Get lovely tutorials daily!
Subscribe Now
to receive daily crochet and knit tutorials.
Step-by-Step Instructions for a 4 Color Granny Square
Step 1: Making the First Triangle (Color A)
- Start with a Magic Ring – This creates a neat, adjustable center.
- Chain 3 (counts as the first double crochet).
- Work 2 Double Crochets (DC) into the ring.
- Chain 2, then 3 DC into the ring.
- Repeat this step two more times to form a triangular shape.
- Slip stitch to join, fasten off, and pull the magic ring tight.
Your first colored triangle is complete! Now, let’s add the second color.
Step 2: Attaching the Second Triangle (Color B)
- Attach yarn to a corner space with a slip knot.
- Chain 3, then work 2 DC into the same space.
- Continue forming the triangle by following the pattern from Step 1.
- Join with a slip stitch, fasten off, and weave in the tail.
Now you have two adjoining triangles—time to add the third!
Step 3: Adding the Third Triangle (Color C)
- Attach the yarn to a new corner and repeat the process.
- Ensure the new stitches align seamlessly with the previous ones.
- Fasten off, leaving a clean edge.
At this point, your granny square is taking shape!
Step 4: Completing the Square (Color D)
- Attach your final color to the last remaining corner.
- Work the same pattern to create the fourth and final triangle.
- Fasten off and weave in the ends.
You now have a perfectly structured 4 color granny square!
Best Color Combinations for 4 Color Granny Squares
Struggling to pick the right shades? Here are some foolproof combos:
🎨 Bold & Bright: Hot pink, turquoise, lime green, and sunshine yellow.
🌿 Earthy & Natural: Beige, olive green, rust, and cream.
🎄 Festive & Cheerful: Red, white, green, and gold.
🌊 Cool & Calming: Navy, sky blue, lavender, and white.
Mix and match according to your aesthetic—there are no limits!
How to Join Multiple 4 Color Granny Squares
Once you’ve made several squares, you’ll need to join them to form a larger piece.
Option 1: Whip Stitch (Invisible Seam)
- Place two squares right sides together.
- Using a tapestry needle, whip stitch through the back loops only.
- Keep stitches even for a seamless finish.
Option 2: Join-As-You-Go (JAYG) Method
- Work a final round of single crochets, attaching to adjacent squares as you go.
- This method creates a continuous, flexible fabric perfect for blankets.
Option 3: Slip Stitch Join (Decorative Edge)
- Place squares side by side and slip stitch through adjacent loops.
- This adds a subtle ridge, great for outlining individual squares.
Creative Ways to Use 4 Color Granny Squares
Once you master the 4 color granny square, you can use them in countless projects:
🛋 Cozy Blankets – Combine dozens for a patchwork masterpiece.
👜 Boho Bags – Sew them into a stylish tote.
🛏 Pillow Covers – Add texture and color to home decor.
👗 Wearable Fashion – Use them for cardigans or vests.
🧣 Scarves & Shawls – A lightweight option for chilly days.
Let your imagination run wild with this colorful technique!
Expert Tips for a Flawless 4 Color Granny Square
✨ Block Your Squares: Steam or wet-block them for a uniform look.
✨ Secure Yarn Changes: Weave in ends securely to prevent unraveling.
✨ Use High-Contrast Colors: Make each section pop for a striking effect.
✨ Keep Tension Consistent: Ensures even, polished stitches.
With these techniques, your crochet work will always look professional.
The 4 color granny square is a fun and vibrant way to level up your crochet skills. Whether you’re making a single square or an entire afghan, the creative possibilities are endless.
Now, grab your yarn and hook, and let’s get crocheting! Happy stitching! 🧶💕
Follow CrochetBeja on your favorite social media sites: Facebook, Pinterest, Youtube , Instagram and subscribe for the Newsletter so you don’t miss a thing!
Tutorial and photos of this 4 color granny square by: Ophelia Talks Crochet.


Meryl Elliott
When teaching how to crochet could you go really slow, it’s not easy having to sto the video all the time.