If you’re looking to combine nostalgic charm with modern boho style, the crochet granny square bag is your go-to project.
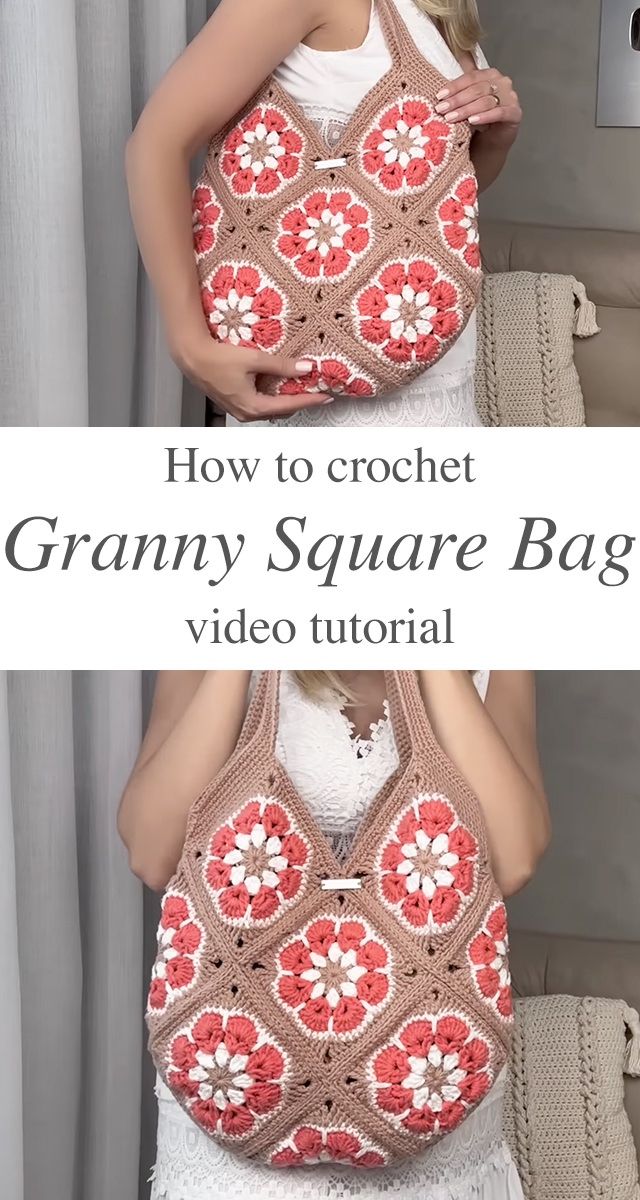
The Crochet Granny Square Bag
With its vibrant, flower-inspired motifs and endless customization options, this retro-meets-chic accessory is taking the handmade fashion scene by storm. Whether you’re heading to the farmer’s market, a coffee date, or just want to elevate your everyday outfit, a granny square bag is a statement piece that carries more than just your essentials—it carries your creativity. Let’s unravel the process and bring this beautiful, functional piece to life.
Flowers Related Posts:
Related Posts
The crochet granny square bag featured in the video tutorial below showcases floral-inspired squares in earthy tones—think terracotta, cream, and taupe—stitched together to create a unique patchwork look. It’s charmingly rustic yet effortlessly stylish.
Materials You’ll Need
To make your own crochet granny square bag, you’ll need just a handful of materials: worsted weight cotton yarn in three complementary shades (typically one for the floral center, one for the petals, and one for the background), a 3.5 mm crochet hook, a tapestry needle for weaving in ends, scissors, and optionally a toggle or button for closure and fabric for lining to enhance durability. Cotton yarn is ideal for its structure and longevity, though a soft acrylic blend can also work if you prefer a more relaxed drape. The color combination featured in the tutorial—rosy red, creamy white, and warm taupe—creates a vintage floral look, but feel free to mix and match shades to suit your personal style.

Get lovely tutorials daily!
Subscribe Now
to receive daily crochet and knit tutorials.
The Revival of the Granny Square
Granny squares have made a glorious comeback—and they’re not just for afghans anymore. This classic motif, once a staple of vintage home decor, has evolved into a fashion-forward building block used in bags, clothing, and accessories. The beauty lies in its versatility. Each square is like a tiny canvas, letting you play with colors, textures, and stitches.
Making the Squares
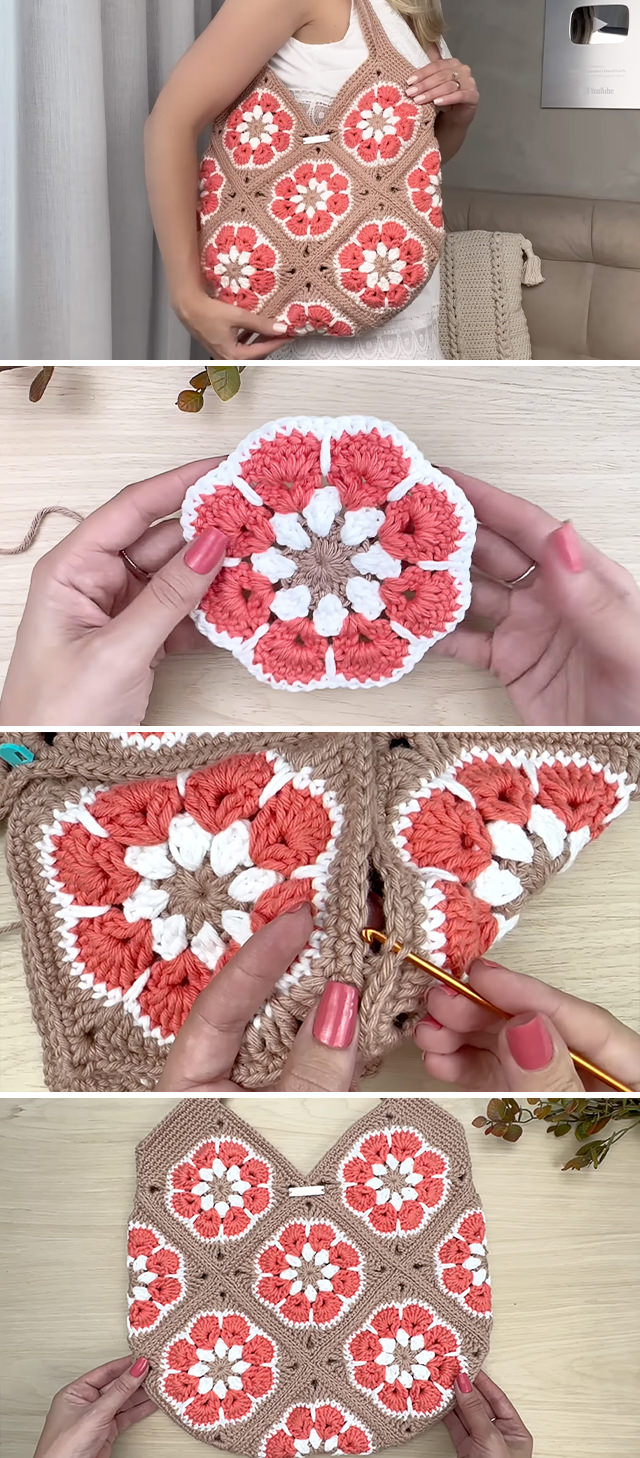
Each square begins with a floral center—clusters of double crochets forming petal-like shapes. The second round adds contrast, and the final round defines the square with clean lines.
To follow the video’s design:
- Start with a magic ring, and work 8 clusters of double crochet petals.
- Switch colors for the second round, working between petals to create layered depth.
- Finish with a neutral color, squaring the circle by adding chains and double crochets in each corner.
Make 13 squares in total. This includes 9 for the main body and 4 for the sides and base. The finished squares measure approximately 10×10 cm (4×4 inches), but you can easily scale them up or down depending on your yarn and hook size.
Assembling the Crochet Granny Square Bag
Here’s where the magic happens. Once your squares are blocked and uniform, it’s time to lay them out and stitch them together. You’ll join them using a single crochet or whip stitch—the tutorial uses whip stitch for a clean seam that keeps the floral motifs intact.
Suggested layout:
- Front: 3 squares across by 2 squares down
- Back: same as front
- Bottom: 1 square centered between the front and back
- Sides: 1 square on each side of the bottom square
Join the pieces in a cross-like configuration first, then fold and stitch up the sides. This modular assembly creates a roomy, structured tote without the need for a separate pattern.
Adding the Strap and Closure
The strap is worked directly onto the bag using rows of single crochet or by crocheting a long strip and sewing it on. For a seamless look, match the strap color with the square borders. The tutorial’s strap attaches from corner to corner, giving the bag a sturdy, ergonomic feel.
For closure, you can add a wooden toggle, magnetic snap, or a simple loop-and-button. A toggle adds a rustic touch and is easy to install—just sew a loop onto one side of the bag and attach the toggle on the opposite.
Optional Lining for Durability
While the granny square design is charming, lining your bag with fabric gives it structure and prevents items from poking through the gaps. Choose a cotton or canvas fabric in a coordinating color or pattern.
Steps to add a lining:
- Cut fabric slightly larger than your bag.
- Fold and hem the edges.
- Sew the lining to the inside using a needle and thread or fabric glue.
Lining also allows you to add pockets—a game-changer for keeping your keys or phone accessible.
Customizations for Crochet Granny Square Bag
Don’t be afraid to get creative! The crochet granny square bag is like a blank slate waiting for your personal touch.
- Use metallic thread or sequins for a glam look.
- Alternate colors for a checkered vibe.
- Add fringe or tassels for a boho flair.
- Try gradient yarns for an ombre effect.
You can also change the size of the bag by using larger or smaller squares, or by adding more rows to the existing layout.
There’s something deeply satisfying about crafting a crochet granny square bag—it’s rhythmic, colorful, and ultimately rewarding. Whether you’re a seasoned crocheter or just dipping your toes into yarncraft, this project is perfect for all skill levels.
It’s more than a bag. It’s wearable art. A slice of handmade nostalgia that’s both functional and fashionable.
So grab your hook, your favorite yarns, and get stitching. Your next favorite accessory is just a few granny squares away.
Follow CrochetBeja on your favorite social media sites: Facebook, Pinterest, Youtube , Instagram and subscribe for the Newsletter so you don’t miss a thing!
Tutorial and photos of this crochet granny square bag by: Camila Passadori handmade.


Leave a Reply