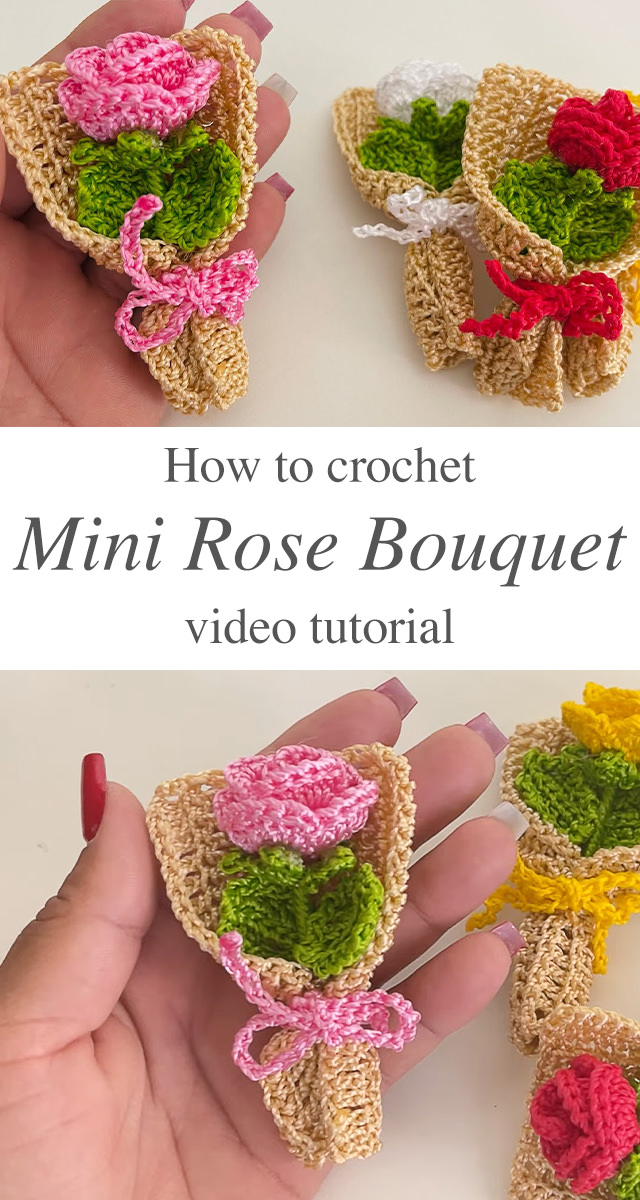
There’s something incredibly charming about a handmade crochet mini bouquet. With a blend of intricate stitches and vibrant yarn colors, you can craft a stunning bouquet that never wilts!
Why Make a Crochet Mini Bouquet?
A crochet mini bouquet is a versatile project perfect for beginners and seasoned crafters alike. Unlike real flowers, these blossoms remain fresh forever, requiring no maintenance. Additionally, they are budget-friendly and allow you to personalize colors and styles to match any theme or occasion. Whether used as wedding favors, keychains, brooches, or home decorations, these miniature bouquets exude elegance and creativity.
Flowers Related Posts:
Related Posts
Whether you’re looking for a unique gift, an elegant embellishment, or a delicate home decor piece, these tiny floral creations add a touch of warmth and artistry to any space.

Materials
Before starting, gather the following supplies: Cotton or acrylic yarn in beige (for the wrapping), green (for leaves), and your preferred flower shades (pink, red, white, or yellow). A 1.75mm crochet hook is perfect for this kind of project. You’ll need scissors for trimming excess yarn and tapestry needle for weaving in ends, floral wire (optional) to add stiffness and shape, and ribbon or lace for final embellishment.
Get lovely tutorials daily!
Subscribe Now
to receive daily crochet and knit tutorials.
Step-by-Step Guide to Crafting Your Crochet Mini Bouquet
1. Creating the Mini Roses
Start with your selected flower color yarn and create a magic ring. Follow these steps:
- Chain 25-30 (depending on how full you want the rose to be).
- Work double crochet (dc) stitches in the second chain from the hook.
- Continue adding dc stitches across the chain to create a ruffled effect.
- Once completed, roll the strip into a spiral to mimic rose petals.
- Secure the base by stitching through the layers with a tapestry needle.
2. Crafting the Leaves
To add realistic greenery to your bouquet:
- Chain 6 and work single crochet (sc) stitches along one side.
- Increase in the middle to give the leaf a natural curve.
- Work along the opposite side of the chain to form an oval leaf shape.
- Fasten off and weave in the ends.
3. Assembling the Bouquet Wrapping
- Using beige yarn, chain 35-40 to form the base.
- Work rows of single crochet (sc) stitches until the piece forms a small rectangle.
- Fold the rectangle into a cone shape and secure the edges with a whip stitch.
- Attach a bow or ribbon to the front to give it a polished look.
4. Putting Everything Together
Now that all elements are complete, it’s time to assemble the bouquet:
- Arrange your mini roses and leaves inside the crocheted wrapper.
- Sew them in place or use hot glue for a secure hold.
- Wrap a thin ribbon around the bouquet’s base to give it a neat and decorative touch.
Creative Variations to Try
The beauty of a crochet mini bouquet lies in its customization. Here are some fun ideas:
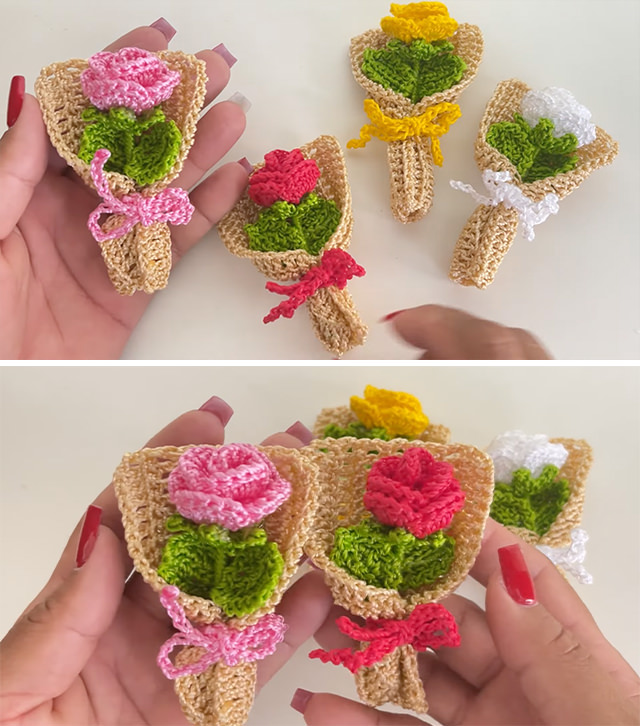
- Multicolor Bouquet: Use different shades for a vibrant floral mix.
- Lacy Wrapper: Instead of solid stitches, try lace patterns for a delicate effect.
- Beaded Embellishments: Add pearl beads in the flower centers for an elegant touch.
- Lavender or Sunflower Variations: Experiment with different floral designs like crochet lavender sprigs or sunflower petals.
Uses for Crochet Mini Bouquets
Once your crochet mini bouquet is ready, you can use it in various creative ways:
- Gift toppers: Attach it to a wrapped present for a unique handmade touch.
- Keychains & Bag Charms: Secure a keyring to make an adorable accessory.
- Wedding Favors: Handcrafted bouquets make memorable keepsakes.
- Home Decor: Place in a small vase or shadow box for a long-lasting floral arrangement.
Crafting a crochet mini bouquet is a rewarding experience that allows you to express creativity while making something meaningful. Whether as a gift or a keepsake, these tiny handmade flowers bring joy, color, and elegance to any occasion. So grab your yarn and hook, follow the tutorial, and let your crochet blooms flourish!
Follow CrochetBeja on your favorite social media sites: Facebook, Pinterest, Youtube , Instagram and subscribe for the Newsletter so you don’t miss a thing!
Tutorial and photos of this crochet mini bouquet by: silva artes crochê.


Nancy
Would love to know the name of the thread you used for this project. These are BEAUTIFUL!