Crochet isn’t just for blankets and sweaters—it’s also the secret to creating lightweight, elegant jewelry that feels both modern and meaningful. One standout project? The crochet bracelet. Minimalist yet eye-catching, this small accessory blends texture, structure, and personal flair.
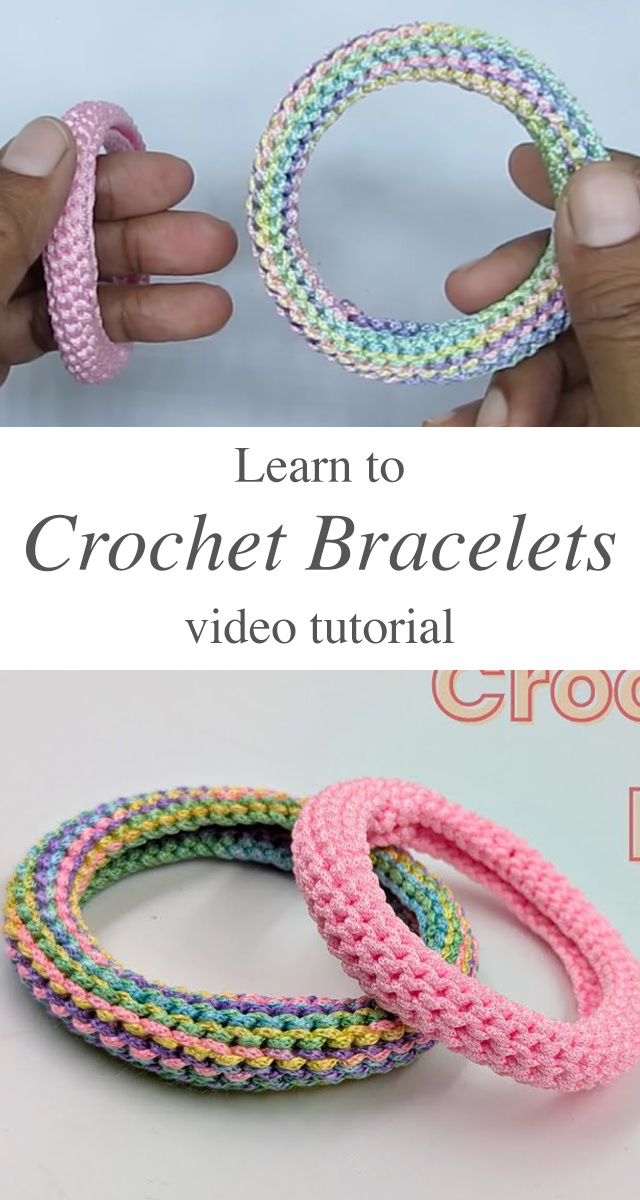
The Crochet Bracelet
Crochet jewelry is making a bold comeback—and nothing says chic like a handcrafted crochet bracelet. These delicate yet durable accessories bring an artisanal charm that pairs seamlessly with both casual wear and evening ensembles. Whether you’re a seasoned fiber artist or a curious beginner, crafting your own crochet bracelet is a gratifying way to blend creativity and style. Whether you’re dressing up a casual outfit or gifting something special, a handmade crochet bracelet is the perfect combination of charm and craftsmanship. This guide walks you through the process step-by-step, based on a beautiful and beginner-friendly technique from a popular video tutorial.
Bracelets Related Posts:
Related Posts
Let’s explore how to create a crochet bracelet that’s both eye-catching and practical, using a tutorial that simplifies the process while leaving room for personal flair.
Materials You’ll Need
To crochet your own bracelet, you’ll need just a few materials: a macramé or satin cord around 2mm thick to ensure structure and shine, a 3.5mm crochet hook for ease of movement, a pair of sharp scissors, and a tapestry needle to help finish things cleanly. Optionally, keep a lighter or a dab of clear-drying glue on hand to secure the cord ends and prevent fraying. That’s all it takes—simple tools, simple joy.

Get lovely tutorials daily!
Subscribe Now
to receive daily crochet and knit tutorials.
Mastering the Crochet Bracelet Technique
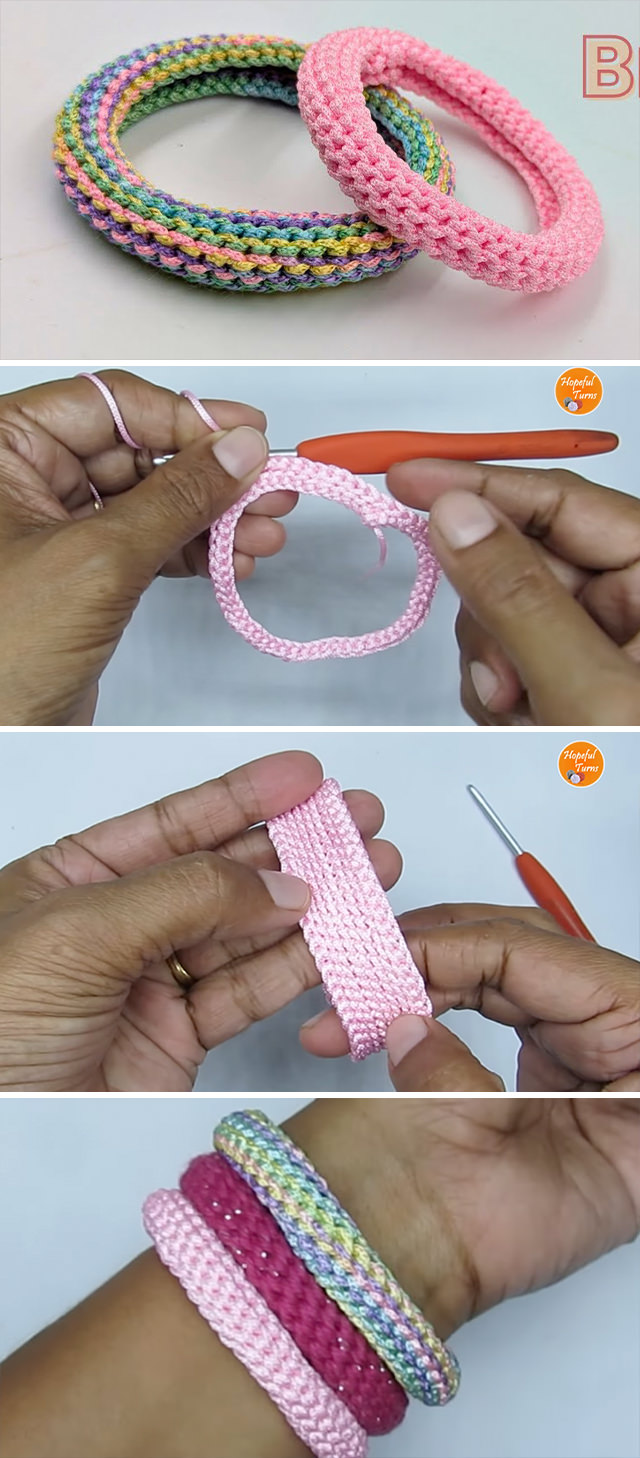
At the heart of this crochet bracelet lies a simple spiral structure, built from chain stitches and single crochets worked in the round. What makes this bracelet unique is the use of thick cord, which transforms basic stitches into bold, sculptural texture.
Step-by-step highlights from the video tutorial:
- Create a Slip Knot and make a chain of 7 stitches.
- Join the Chain into a Ring with a slip stitch.
- Begin Single Crochets into the Center of the Ring, not the top loops. This creates the thick, coiled structure.
- Continue crocheting in a spiral without joining, always inserting the hook into the ring’s center.
- Once you reach your desired length (enough to wrap around your wrist), pull the cord through the last stitch and cut the end.
This technique gives the bracelet its signature tubular shape—reminiscent of I-cord but with a subtle, handmade twist.
Sizing & Customization Tips
Every wrist is unique, and your crochet bracelet should be too. The flexibility of the spiral design means you can size it perfectly without fuss.
- Measure your wrist and add a little extra length for ease.
- To make it adjustable, consider adding a loop and button closure or a sliding knot.
- Want to personalize the texture? Try alternating single crochet with half-double crochet or using variegated cord for a gradient effect.
Mix and match colors, or add charms and beads for an extra layer of detail. Even a single change in yarn texture can dramatically alter the bracelet’s look and feel.
Finishing Touches
A beautifully crocheted bracelet deserves a polished finish. Here’s how to elevate your final piece:
- Weave in the cord ends using a tapestry needle, securing them inside the tube for a clean appearance.
- For extra durability, dab a bit of strong glue on the ends or melt them slightly with a lighter.
- Gently block your bracelet (especially if using softer yarn) to ensure an even shape.
Presentation matters. Wrap your bracelet in tissue paper or a drawstring pouch—ready for gifting or personal flair.
Why Crochet Bracelets Are the Perfect Handmade Gift
There’s something intimate and thoughtful about a crochet bracelet. It’s a statement piece and a gesture of care wrapped in one. Lightweight, trendy, and easy to customize—they make ideal gifts for birthdays, holidays, or “just because.”
The best part? You can finish one in under an hour, making them perfect for last-minute gifts or stocking your craft booth.
Creating a crochet bracelet is more than a quick project—it’s a celebration of handmade beauty in a world of mass production. Each twist of cord, each looped stitch, speaks to intention and individuality.
So why not trade fast fashion for something a little more personal? Your next favorite accessory is just a hook and a cord away.
Whether you wear it stacked with bangles or solo as a minimalist piece, your crochet bracelet is sure to turn heads and spark conversation.
Follow CrochetBeja on your favorite social media sites: Facebook, Pinterest, Youtube , Instagram and subscribe for the Newsletter so you don’t miss a thing!
Tutorial and photos of this crochet bracelet by: Hopeful Turns.


Kerry L. Creel
The video does not match the description of the pattern whatsoever. I am so confused. Also, in the written pattern it says to always crochet in the center ring? I haven’t tried it, but that does not seem possible in making a tubular bracelet like the words state. Then the video starts with much more than seven stitches. Please help me to understand!
Jen
Thank you! I came here to say this! Im not sure i understand the crocheting in the center bit. But when I went to watch the video, its completely different than the written directions.